 A good coat of wax does more than add a glossy finish to your car. It protects the paint from the damaging effects of weather and time. From technique to the right tools, you can learn a lot from this handy guide! Keep your car looking its absolute best with these tips for effectively waxing and buffing.
Tools of the Trade
It’s important to assemble everything you’re going to need for this job before you begin. Make sure to have the following items within reach:
- A hose (attached to a water source)
- A bucket filled with automotive or dish soap
- A clean, soft sponge
- Applicator pads
- A pair of chemical-resistant gloves
- Wax remover
- Heavy-duty “shop” paper towels
- Several microfiber cloths
- Drying towels or chamois
- A bottle of your favorite automotive car wax
Step One: Wash
Start by thoroughly washing your car. Rinse off as much dirt and debris as possible, and don’t skimp on crevices where dust often hides. Once the surface is wet, fill your wash bucket with warm water and soap. Dip in a sponge and scrub off any remaining dirt, tar, and bugs.
Work your way from the top of the vehicle down, and don’t forget the wheels and tires. Do a final rinse to remove any soapy residue and dry your car thoroughly with a towel or a chamois.
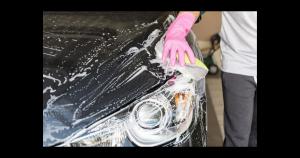
Step Two: Prep
Now is the time to don your disposable gloves. Grab a few layers of shop towels and apply a dollop of wax remover directly on the sheets. Begin with one panel of the car, and begin rubbing. Move in a consistent direction over the clear coat, removing any remaining contaminants stuck to the paint.
Step Three: Apply the Wax
Grab your applicator pads and the wax. Start by reading the instructions on the back of the bottle. Most products apply similarly to how we’ll describe. However, it’s always good to study the manufacturer’s tips before you begin.
Shake the wax bottle well, then apply a nickel-sized layer on one side of the applicator pad. Just like you did with the wax remover, focus on one 2-foot by 2-foot section of the car at a time.
Press gently but firmly on the car’s surface, moving in a circular motion. Your mission here is to apply a thin film of wax across your vehicle’s entire painted surface. Let it dry to a haze, then move on to the next section until you’ve coated the whole car.
Step Four: Buff
Once the car is covered in wax, use a dry microfiber towel to buff the finish. Make sure the wax is completely dry before you start rubbing. Using firm pressure and overlapping strokes, move from one area to the next, paying attention to crevices, like around the door panels. Switch to a clean cloth once the wax builds up on the towel.
Now, you’ve conquered this tough job and you’ve got a shiny car! Thanks to your effort, its finish is protected for 12 months. Revisit this article when you need to wax it again next year!
Image via pixabay.com | Licensed under Pixabay License
Connect with us


